OmniX Platform
  • Introduction
    • Omnix Service
    • Level User
    • Login
    • Chat Internal
    • Aux
    • Setting Profile
    • Two-Factor Authentication (2FA)
    • Logout
  • Administration & Configuration
    • Dashboard Administration
    • QA Evaluation
    • Log
    • Ticket
    • Customer
    • Contact Management
    • Setting
      • Manage User
      • Manage Unit and Skill
      • Manage Business Hours and Holiday
      • Manage Group User and AUX Reason
      • Manage Channel
      • Manage Source and Group Email
      • Manage News and FAQ
      • Mapping Approval Role
      • Setting Approval Status
      • Setting Approval Flow
      • Category and Sub Category
      • Manage Template Message
      • Parking Management
      • Filter Rule
      • Manage Threshold
      • Additional Field Customer
      • Additional Field Ticket
      • Manage Ticket Status
      • Manage Flow Ticket Status
      • Manage SLA Ticket Priority
      • Manage Ticket Notification
      • Template Criteria
    • Report
    • Request Approval
    • Monitoring
      • Agent Monitoring
      • Agent Performance
      • Agent Monitoring Voice
  • Agent User
    • Dashboard Agent
    • Log
    • Task
      • Interaction Manual
      • Interaction Channel Voice
      • Interaction - Flashphoner
      • Interaction Voice - Asterik
      • Interaction Voice - Avaya
      • Interaction Voice - ipscape
      • Interaction RTC
      • Interaction N-RTC
      • Interaction Email
      • Interaction Video Call
    • Ticket
    • Customer
    • Follow Up
  • Backroom User
    • Backroom
    • Ticket
Powered by GitBook
On this page
  1. Administration & Configuration

Contact Management

Dalam menu ini, Supervisor dapat melakukan penambahan atau pengeditan terhadap contact management.

PreviousCustomerNextSetting
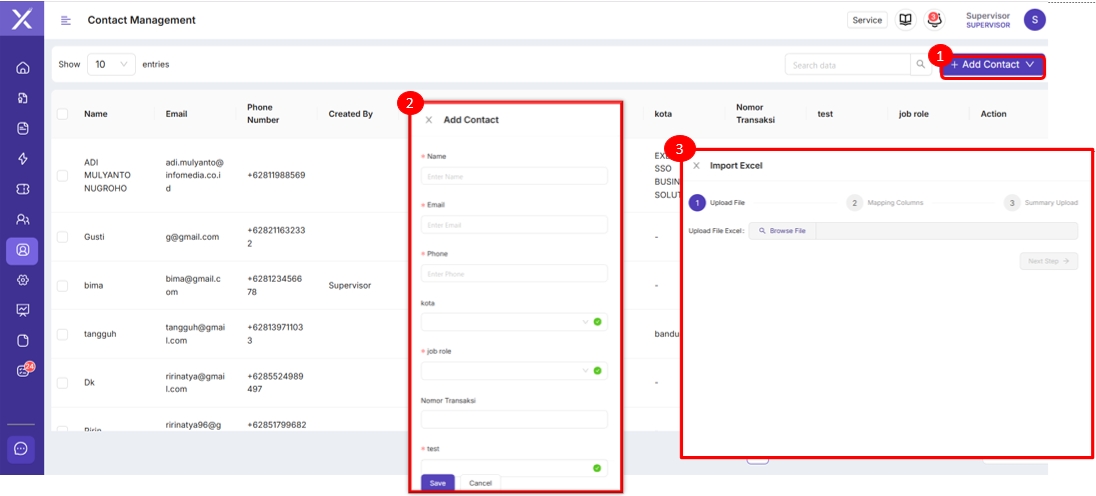
  1. Klik "Add Contact" jika ingin melakukan penambahan kontak. Terdapat dua cara penambahan kontak yaitu secara manual atau import excel.

  2. Pada kolom ini adalah tampilan untuk melakukan penambahan kontak secara manual dengan mengisi form yang tersedia.

  3. Pada kolom ini adalah tampilan untuk melakukan penambahan kontak secara import dengan mengupload data.

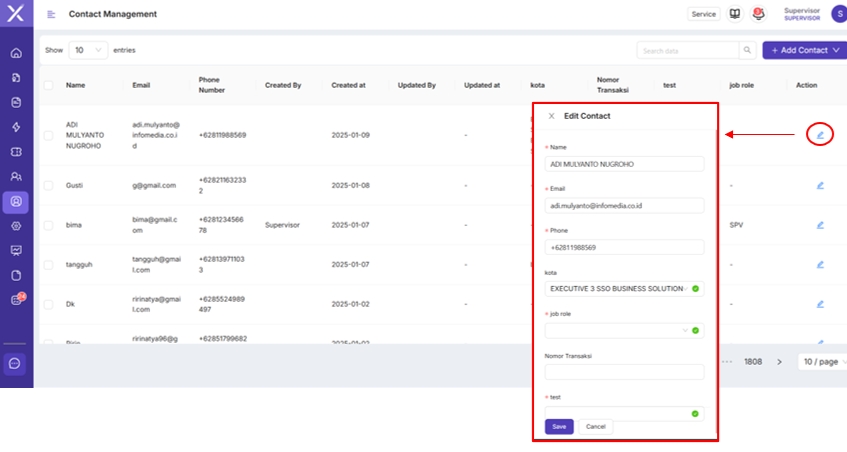
Untuk melakukan perubahan informasi terhadap kontak yang ada, Supervisor dapat mengklik tombol tersebut kemudian melakukan perubahan informasi sesuai dengan yang diinginkan.